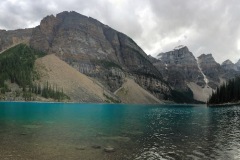
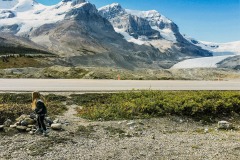
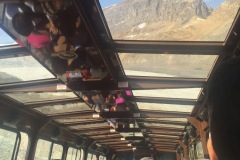
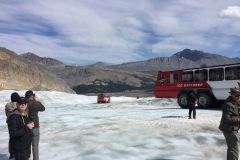
GRAND PRISMATIC SPRING

GRAND PRISMATIC SPRING

Description

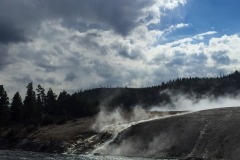
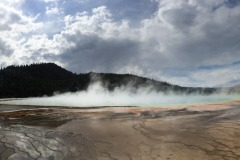
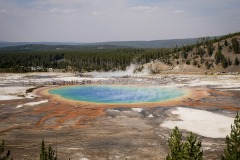
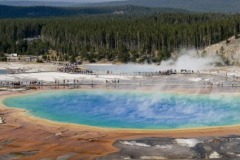
It’s one thing to walk up close and personal to this beauty to feel the wave of steam on your face, but getting up above the steam is a sight to behold.

LENGTH:

1.6 MILES – 200ft Elevation gain

TRAIL DETAILS:

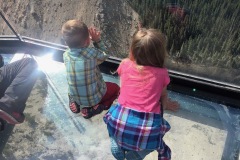
The trail begins from the Fairy Falls Trailhead. Hikers cross a bridge over the Firehole River and walk along a wide crushed-gravel trail. At the first junction, the trail swings left and gently climbs up through new lodgepole growth. Arrive at a large viewing platform. The platform is surrounded by a rail, making this a great hike for the young ones.


Take in the clear view over Grand Prismatic Spring and Excelsior Geyser. The temperature of Grand Prismatic ranges from 145 degrees to 188 degrees, with the highest temperature at the center in the clear blue waters. Just off-center, at a temperature of 165 degrees, the Synechococcus bacterium becomes predominant as noted by the greenish color. Calothrix and Phormidium are cyanobacteria that form the respective dark brown and orange bacterial mats around the outer rim of the spring.


WEATHER

COST

The entrance fee at the gate is $25.00 per vehicle. The pass is good for seven days and will get you in both Yellowstone and Grand Teton National Parks. You can buy a one-year pass for $50.00, and you can buy a National Parks pass for $80.00, which gets you into all national parks in the country

Check the official website for updated fee information.

LOCATION

You can view the spring from the boardwalk in the Midway Geyser Basin, or you can look down on the spring from the top of a small hill accessible from the Fairy Falls Trail. The traditional way to view the Grand Prismatic Spring is to walk next to it on the boardwalk. The spring is located in the Midway Geyser Basin.

DIRECTIONS

.

GPS COORDINATES

Trailhead: (44.5151736,-110.8325500)
Overlook: (44.5233163,-110.8398964)

GEAR CLOTHING WE NEEDED

.

GRAND PRISMATIC SPRINGS GALLERY

BACK TO:

ADVENTURES IN WYOMING

RECENT POSTS:

Our favorite thing about this park is that its free range – no trails. You can go and explore and play all day. It’s huge so even though the parking lot might seem busy, once everything gets spread out and you head out past the main area then you have the whole place to yourself. It’s really neat to

Coming soon…ish – We’re gathering our thoughts, notes, and videos so we can create a guide that gives you information on things we did or wished we would have done.

THE GUIDE WILL INCLUDE:

  • ADVENTURES
    • HIKES
    • EXCURSIONS
    • SCENIC DRIVES
    • VIEW POINTS
    • NATURE WALKS
    • ETC.
  • CAMPING
    • CAMPGROUNDS
    • WILD (Free BLM Land)
  • WEATHER
  • GEAR WE USED/ NEEDED
  • ANIMAL AND PLANT LIFE
  • AND MORE

However, no matter how much we wish we could do everything, it’s just not possible. Amazing places always leave you with wanting more. We will provide you with links to the destination’s main site. There you can add your own interest into your itinerary as well.

NEED HELP NOW:

If you can’t find what you are looking for or if you are are planning your adventure and need help NOW. Reach out to us. We would love to seed you some quick information off the top of our head to get you started.

Ways to reach out:

You can also check out our resource pages on planning an adventure. Especially How to Find Campgrounds Around your Destination.

ADDITIONAL INFORMATION:

In the meanwhile,  you can view any of our recent posts. Check out our learning posts that gives you tips and tricks as well as free printable packing list and meal plans. Double check your gear and view what we use on our gear and vehicle mods pages, or even just get to know us.

Thanks for being patient as we continue to build these guides of where we have been over the past 15 years and where we are now.

WHERE WE ARE NOW:

HIGHLINE TRAIL

HIGHLINE TRAIL

Description


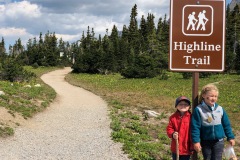
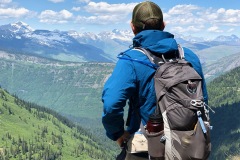
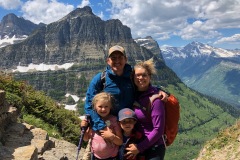
This was our number one hike we wanted to do. the first time we tried it was closed due to no visibility, snow and ice. We waited 8 days and blue skies showed up just in time.

LENGTH:

Choose your distance if out and back. We went in 2 miles and turned around, so we went a total of 4 miles, and felt like it was an amazing hike! Going this way, the hike was easy and not strenuous, however, if you do the full loop of 11.8 miles it is very strenuous with an elevation gain of 1950 feet.

TRAIL DETAILS:
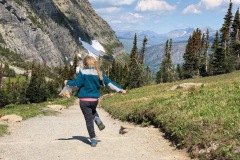
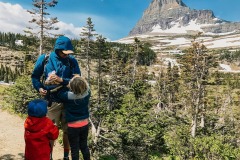
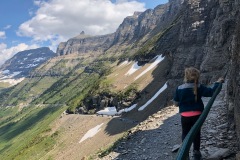
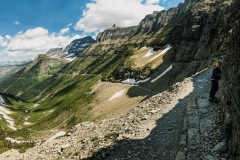
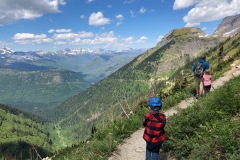
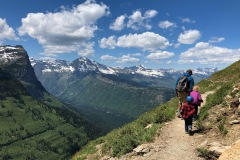
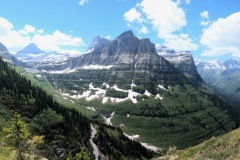
The Highline Trail shoots north along a cliff on the western side of the Continental Divide. The trail is carved into a sheer rock face known as the Garden Wall. Below the trail is a vertical drop to Going-to-the-Sun Road.
The trail is wide enough for hikers to pass in both directions, and there is a chain to hold on to through a precarious stretch near the start of the hike. Keep an eye out for wildlife! We saw bighorn sheep, marmot, and cute ground squirrels.

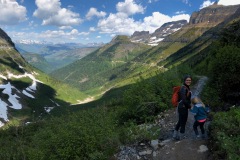
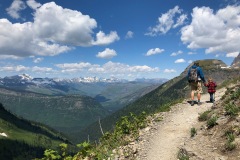
You’ll also cross seasonal waterfalls fueled by snowpack runoff, and enjoy constant westward views toward impressive summits like Mount Oberlin. The level rocky trail allows steady progress for the first three miles leading to the base of a rise protruding from the Garden Wall named the Haystack. We stopped here but this trail continues on for another 10.5 miles that takes you to the Many Glacier Region.

One day we’ll tackle this… It’s always fun to have something to look forward too.


WEATHER

COST

Effective June 1, the park entrance fee will be $35 per vehicle or $30 per motorcycle. An annual park pass will cost $70.

The Trail doesn’t require any permits if you are not backpacking and just day hiking.

Check the official website for updated fee information.

LOCATION

You can find the trailhead at Logan Pass, just across Going-to-the-Sun Road from the park visitor center.

DIRECTIONS

To get to the trailhead: Highline Trail starts at Logan Pass on Going-to-the-Sun Road at the Continental Divide. The Loop is located 7.75 miles down the same road west side of the divide. The free park shuttle stops at both locations.

GPS COORDINATES

Trailhead coordinates: 48.696343, -113.7176

GEAR CLOTHING WE NEEDED

.

GLACIER’S HIGHLINE TRAIL GALLERY

BACK TO:

ADVENTURES IN MONTANA

RECENT POSTS:

DELICATE ARCH

DELICATE ARCH

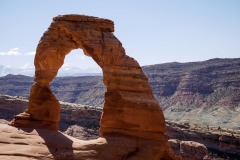
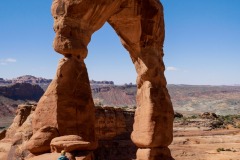
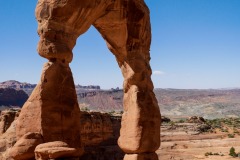
The sudden appearance of this beautiful arch, perched on the edge of a huge sandstone bowl and framed by the scenic La Sal Mountains, will literally take your breath away.

Description

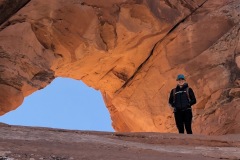
If you’re in Utah it is hard to miss the iconic image of Delicate Arch because it’s everywhere and even in your face on our license plates! However, it’s only when you hike to the arch that you will gain a full appreciation of this stunning natural formation! The opening below the arch is 46 feet high, making this the largest free-standing arch in Arches National Park, and known around the world.


During most of the hike, the arch is hidden from view. It is only at the end, as you round the end of a sandstone ridge, that Delicate Arch springs into view. The sudden appearance of this beautiful arch, perched on the edge of a huge sandstone bowl and framed by the scenic La Sal Mountains, will literally take your breath away.

LENGTH:

3.2 miles round trip and climbs 480ft.

TRAIL DETAILS:


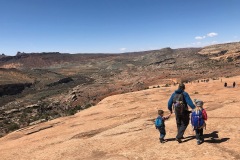
The hike to the arch is not difficult. The short, popular trail traverses a desert landscape along a wide, well-defined trail for the first 0.75 miles and then follows a cairned trail up a slick rock slope with nice views of the red rock formation to the south. The hardest part is around 1 mile where you walk up a steep section of slickrock. Along the way, follow the rock cairns, or the people in front of you, for it is a very busy hike. Shortly before reaching the arch, the trail travels along an exposed sandstone ledge, which may be a concern for anyone with a fear of heights.
As an added bonus a 0.25 miles side trip near the trailhead visits a small panel of petroglyphs on a rock face near the Wolfe Ranch.
Oh! And for some added fun try this hike at night the 2nd time by the moonlight!


WEATHER

Make sure to bring sunscreen, and at least 2 liters of water per person.

Spring and Fall are the best months to visit to avoid the heat. There is no shade along this hike, so if you do go in the summer make sure to bring extra water.

Winter is the best month to go to avoid the crowds.

COST

$25 per vehicle to enter Arches National Park. Check the official website for updated fee information.

However, you can also purchase the Annual Pass for $80 to get into all USA National Parks if you are exploring more in a year’s time. You can purchase these passes onsite or we usually get our from a local REI as well! These are GREAT gifts you know explorers!

LOCATION

The trial head starts at the Wolfe Ranch Parking Area in Arches National Park, Moab UT

DIRECTIONS

The entrance to Arches National Park is north of the town of Moab, Utah.

  • From Moab, drive north on US 191 for five miles, or
  • From Interstate 70 (Crescent Junction), drive south on US 191 for 22 miles.
  •  Drive northward along the park road for 11.7 miles to the Wolfe Ranch Road. Turn right and follow signs to the ranch. Do not follow signs to Delicate Arch Viewpoint, that is a different trailhead.

GPS COORDINATES

Parking Lot: 38.7357 -1095206
Delicate Arch: 38.743517,-109.499341

GEAR CLOTHING WE NEEDED

.

DELICATE ARCH GALLERY

BACK TO:

ADVENTURES IN UTAH

RECENT POSTS:

CATHEDRAL VALLEY

CATHEDRAL VALLEY

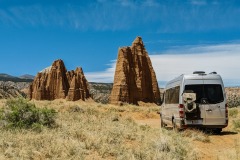
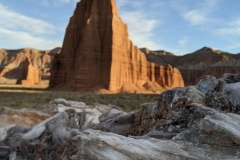
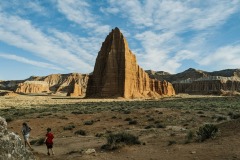
A 57 mile dirt road at the northern end of the park where enormous monoliths soar hundreds of feet high. It’s a vast adventure with a remote one of a kind beauty.

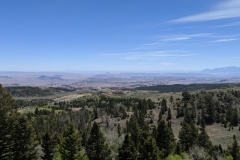
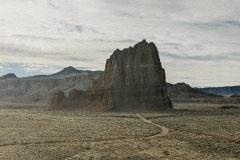
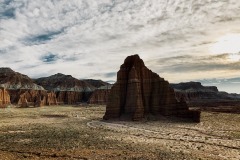
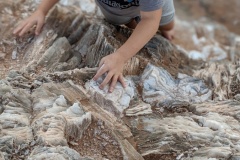
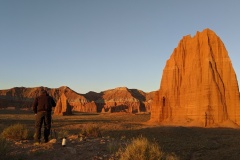
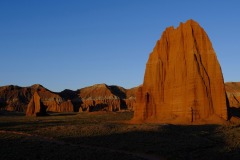
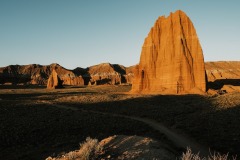
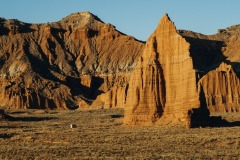
You could do this full drive in a day for sure, however that puts you seeing Temple of the Sun and Moon right in the middle of the day. The sun is bright and it gives the Monoliths a cool, but dull overall color. If you choose to wild camp… you get to view them in all their glory. They glow at sunset and and they are on fire at sunrise. If you’re not a wild camper, make an exception just this one time. Get a little uncomfortable for a night. This is a time that it will be all worth it.

They are cool to see in the middle day sun, but when they’re glowing and on fire, they’re unforgettable.

MIDDAY – SUNSET – SUNRISE

It was amazing to witness. I’ve never seen a rock formation be able to take on so many different colors in light. Even watching the sun set and rise you could constantly see the colors changing every minute. Take a look at our gallery below to view all the colors it turned. We edited with keeping its true tones. It was so beautiful.

SCENIC STOPS:

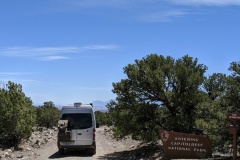
The Entrance: This might be little but this was big to us. There aren’t a lot of National Park Entrances that are a dirt road. We appreciated this and loved every minute of it.

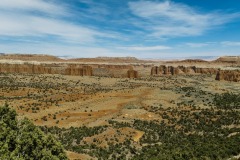
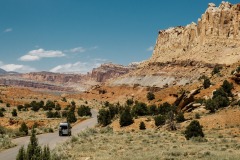
THE OVERLOOK: Take in the vastness of what Capitol Reef really is about. This is just ONE section of Capitol Reef. There is so much more to explore. Take it in, and make plans to come back.

TEMPLE OF THE STARS: Shortly after the Campground you will descend down the steep portion of the overlook and down into some beautiful monoliths! At first we thought these were temple of the sun and moon, but turns out we were wrong. However, still beautiful to behold.

WALLS OF FINS: Take in the beauty of this beautiful drive, with its thin fluted walls.

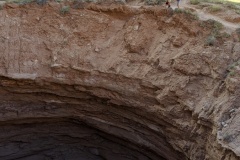
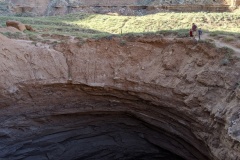
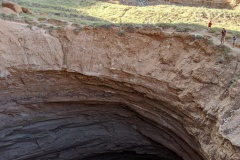
GYPSUM SINKHOLE: This 200′ deep and almost 50′ wide sinkhole is worth a visit but hard to photograph.  I tried my best.

LOWER CATHEDRAL VALLEY: A MUST DO. Why go here without seeing the best part? Again, please stay until sunset or wake up at sunrise. Worth every minute. What you’ll find there:

  • TEMPLE OF THE SUN
  • TEMPLE OF THE MOON
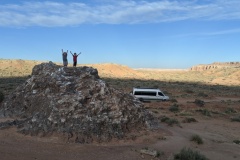
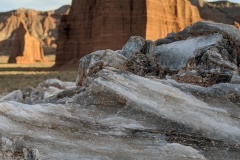
  • GLASS MOUNTAIN: Glass mountain was the coolest of the 3 even though its only about 12ft high. Not really a mountain but we did climb to the top and act like it was! It was beautiful and so unique. Remember, resist the urge to take anything. You’re in a national park. Along the Road to Temple of the Sun and Moon follow the sign to the right that directions you to glass mountain. They’re all very close together.

HIKING ROUTES: There are also hikes you can do, unfortunately we didn’t do any on our visit. Take look here and it will give you more details: HIKING ROUTES

CAMPGROUNDS:

  • The Cathedral Valley Campground is a primitive campground with 6 sites. We heard it is hardly ever full, so there is a good chance you can get a spot. The best part is that this campground is fee to those who are up for the adventure.
  • There are around 10 pull offs along the way that you can stay at along the road if you wanted to wild camp.
  • WILD CAMPGROUNDS: There are also 2 larger group wild camping stops closer to The Temple of the Sun and Moon. The closest one that we stayed at is located at 38.458, -111.180 You can see the very tip of the Temple of the Sun. We also had the place to ourselves. At sunset and sunrise. We couldn’t believe it!

LENGTH:

  • 57.6 MILES OR WHENEVER YOU WANT TO TURN AROUND.
  • ALLOT AROUND 6-8 HOURS
Distances from Highway 24 starting on the Hartnet Road (traveling clockwise)
  • Hwy 24 junction to Lower South Desert Overlook – 15.2 miles
  • Hwy 24 junction to Upper South Desert Overlook- 27.2 miles
  • Hwy 24 junction to Cathedral Road Junction- 27.8 miles
  • Hwy 24 junction to Cathedral Valley Campground- 28.1 miles
  • Hwy 24 junction back to Hwy 24 via Cathedral Rd 57.6 miles

TRAVEL DETAILS:

This driving loop takes about 6-8 hours to complete. Most visitors to Cathedral Valley drive the 57.6 mile (92.7 km) loop clockwise, beginning on the Hartnet Road located 11.7 miles (18.8 km) east of the visitor center on Highway 24 and continuing on that for 27.8 miles (44.7 km) to Hartnet Junction. Turn right (north) onto Cathedral Road and driving 29.9 miles (48.0 km) back to Highway 24 will complete the loop. 

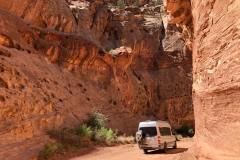
We want to first say that you do need a high clearance vehicle if you are going when the Harnett Road River Fjord is high and you have to cross. However, you don’t have to go that way if you don’t have a high clearance vehicle. You can start on the Cathedral Road crossing near Caineville, drive to the Sun and Moon, and then just turn around the way you came. That would be totally worth it and not too long of a drive either. However, if you can, continue on there is so much more to see.

We started at Harnet Road Crossing. It was pretty simple to just follow the road signs that take you all they way down. We did use our Garmin Overlander that has GPS so that helped. I have listed the coordinates below for you.

and then just drive the same way out instead of doing the loop. We went in May and the river bed was dried up. We never got to adventure crossing it you could try that as well. You can read more tips planning and safety here.

GPS COORDINATES

  • Cathedral Valley Entrance Sign: 38.469, – 111.381
  • Temple of the Stars: 38.489, -111.353
  • Gypsum Sink Hole: 38.499, -111.319
  • Temple of the Sun, Moon, and Glass Mountain: 38.499, -111.319

You can always put GPS Coordinates into your map apps and as long as you have it loaded up before you loose service it will work!

GEAR CLOTHING WE NEEDED

With climbing up and down on sandstone it’s best to have good grip hiking shoes or sandals. Here are our favorites.

During those warm summer months just make sure to bring sun screen, a hat, and always extra water. We always like our Days packs with our hydration bladder. Here are a few of our favorites.

CATHEDRAL VALLEY GALLERY

BACK TO:

Click here to return to our Complete Guide to Capitol Reef National Park

RECENT POSTS:

THE TANKS TRAIL

THE TANKS TRAIL

In the course of just one mile, the trail passes a petroglyph panel, several hundred historic signatures, a small natural arch and a sequence of water-filled potholes, and a narrow, rocky side canyon that also has potholes, and dryfalls.

We have attempted this trail twice. Once was when the kids were younger and it was\

LENGTH:

  • 2 MILES –
  • ALLOT AROUND 1.5 HOURS

TRAIL DETAILS:

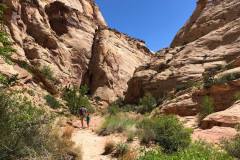
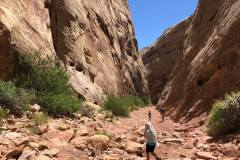
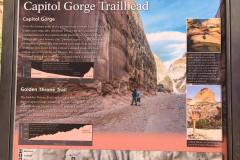
The parking lot at the end of the road is often quite crowded; arrive early or late in the day to secure a spot. Two trails take off from the Capitol Gorge Trailhead: a steep, moderately strenuous climb to a viewpoint of the Golden Throne and the easy stroll through the gorge. The Capitol Gorge hike begins at the covered picnic area at the road’s terminus and strikes out east into the slender canyon.

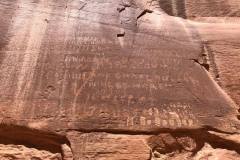
Follow the wide and sandy track for around ¼ mile the trail does indeed drop into the wash bottom, where most of the remainder of the hike will stay. Scan the right-hand wall for a peculiar sight of the Pioneer Register of a jumble of names and dates. From here, Capitol Wash slices through the Navajo sandstone, carving a canyon that thins to as little as 15-20 feet wide in several places. The etchings continue—and pick up in frequency—as hikers approach the Pioneer Register, a jumble of names and dates on the left-hand wall roughly 6/10 mile from the trailhead.

After the register, two minor ravines enter from the left and right, followed within minutes by another pair of larger side canyons. To the north is Tanks Draw, which hosts a series of waterpockets accessible by a short spur trail.

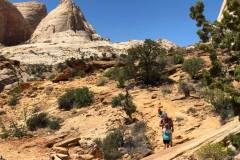
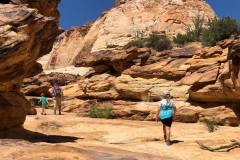
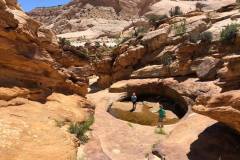
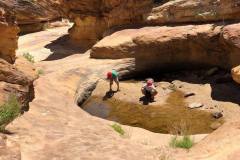
The side trip to the Tanks is well-marked and begins approximately 8/10 mile from the trailhead. The trail is rocky and rugged and climbs more than 100 feet over the course of ¼ mile, ending at an attractive drainage boasting—at most times—a half-dozen potholes full of water. The Tanks support one of Capitol Reef’s most interesting microenvironments—check for tadpoles and fairy shrimp, as well as lichens and mosses. The kids loved them and didn’t want to leave! However, when we were there their was only 1 tank with water and it barley had any. Somehow there were tadpoles still living and flourishing in it!

LOCATION

From the Visitor Center, drive south on the Scenic Drive for eight miles, turning left onto the unpaved Capitol Gorge Road. There are spectacular views from the road itself as it hugs the canyon walls. 

GPS COORDINATES

  • 38.2095986, -111.1694514

GEAR CLOTHING WE NEEDED

With climbing up and down on sandstone it’s best to have good grip hiking shoes or sandals. Here are our favorites.

During those warm summer months just make sure to bring sun screen, a hat, and always extra water. We always like our Days packs with our hydration bladder. Here are a few of our favorites.

CAPITOL REEF GALLERY

FUN FACT:

On the walls before the Pioneer Register are the names of six surveyors near the top of the vertical face—Stewart, Stewart, Hayes, Hurst, Ollrton, Gifford—and the date: September 24, 1911. How—and why—did these adventurous contractors carve their names so high up the canyon wall? The story told today involves what amounted to a pioneer prank. The six contractors conceived an idea: lower one of the members down from the top in a bucket to carve the names, then return a few years later with their families, to whom they would explain with astonishment—lying that they once etched the names standing in the wash bottom—“look at how much the canyon has eroded!” Whether the trick achieved its desired effect remains a mystery.

BACK TO:

Click here to return to our Complete Guide to Capitol Reef National Park

RECENT POSTS:

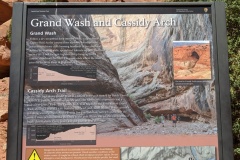
GRAND WASH NARROWS TRAIL

GRAND WASH NARROWS TRAIL

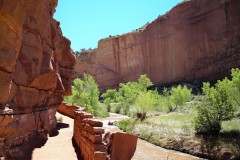
The narrows section of this canyon is short, only about half a mile long. But it is spectacular, and reminds many visitors of a miniature version of the famous Zion Narrows.

We have attempted this trail twice. Once was when the kids were younger and it was a hot summer day around nap time, and they just weren’t having it. We started on the west side and turned around a mile in. It was just one of those days. So we came back a few years later and attempted it from the East side and made it to the Narrows! A little past the narrows. We figured we already did the West side so we turned around and make it a 4 mile hike instead of a 6.

I would say that the East side is the best place to start, and then you can turn around at the Narrows and if you’re feeling good go and Hike Cassidy Arch as well! Sounds like a good day and then you can go rest at camp or enjoy a nice pie or some fresh fruit from the orchard in the fall.

LENGTH:

  • 4 – 6.25 Miles round trip. we went a little beyond the Narrows and then turned around.
  • You can hike back the way you came once you reach Cassidy Arch and the Scenic Road. But there are alternatives, such as having a shuttle waiting at the trailhead on the Scenic Road, or hiking up the Cassidy Arch Trail, onto the Frying Pan Trail, and down into Cohab Canyon. This route would drop hikers back on Highway 24, but 2.84 miles west of the northeastern Grand Wash trailhead.

TRAIL DETAILS:

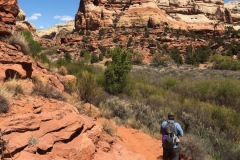
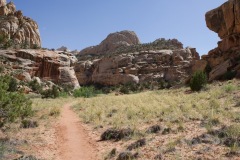
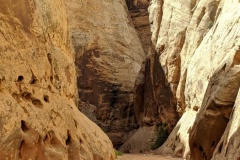
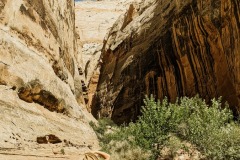
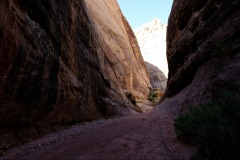
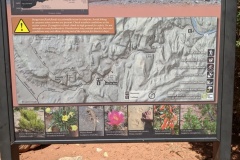
Grand Wash is a famous gorge that cuts its way through the upper portion of the Waterpocket Fold in Capitol Reef National Park. The wash connects the Scenic Road as it heads south past Cassidy Arch, to Highway 24 just east of Spring Canyon. The wash is level throughout almost the entire route, though it is full of streambed sediment. Only at the narrow does the trail close in and get tight.

  • GRAND WASH NORTHEAST TRAILHEAD The northeast trailhead is actually the lower end of the canyon, and empties into the Fremont River. The northeast trailhead is just over 300 feet in elevation lower than the southwest trailhead, meaning that there is very little of a noticeable slope throughout the hike.
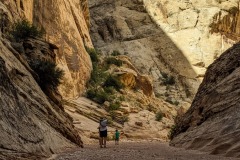
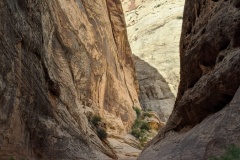
  • GRAND WASH NARROWS The narrows section of this canyon is short, only about half a mile long. But it is spectacular, and reminds many visitors of a miniature version of the famous Zion Narrows.
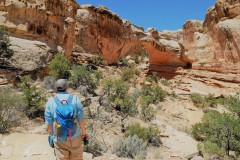
  • CASSIDY ARCH TRAIL JUNCTION Cassidy Arch is a large, well-formed arch along the rim of the Waterpocket Fold, just above the junction of Grand Wash and the Scenic Road. The trail takes hikers up above the arch, or onto the Frying Pan Trail, a hike that treks cross-country over the Fold, and down into Cohab Canyon.
  • GRAND WASH SOUTHWEST TRAILHEAD The trailhead is not directly on the junction of Grand Wash and the Scenic Drive. There is a parking area about 300 yards up the wash, just before the trail gets lost between the gargantuan rock walls that loom up above it.

LOCATION

Right off of State Route 24 – 3 miles west of the Visitor Center.

GPS COORDINATES

  • N38 15.829 W111 12.939 — 0.0 miles : Grand Wash Trailhead
  • N38 15.932 W111 12.798 — .2 miles : Cassidy Arch Trail split
  • N38 16.297 W111 12.331 — 1.0 miles : Level travel in sandy wash
  • N38 16.331 W111 12.089 — 1.3 miles : Enter ‘Narrows’ section of canyon
  • N38 16.540 W111 12.028 — 2.0 miles : Lower canyon opens
  • N38 16.691 W111 11.549 — 2.5 miles : Trail ends on Highway 24

GEAR CLOTHING WE NEEDED

With climbing up and down on sandstone it’s best to have good grip hiking shoes or sandals. Here are our favorites.

During those warm summer months just make sure to bring sun screen, a hat, and always extra water. We always like our Days packs with our hydration bladder. Here are a few of our favorites.

CAPITOL REEF GALLERY

BACK TO:

Click here to return to our Complete Guide to Capitol Reef National Park

RECENT POSTS:

HICKMAN BRIDGE TRAIL

HICKMAN BRIDGE TRAIL

A towering 400-foot-tall sandstone pillar, located three miles west of the visitor center off Highway 24 and accessible via a short hiking trail.

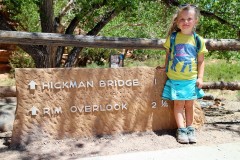
The trailhead to Hickman Bridge gives you three hiking options, depending on how much time and energy you have.

LENGTH:

  • The 1.8-mile round-trip walk to Hickman Bridge takes about 1.5 hours, the 4.6-mile round-trip hike to the Rim Overlook (on the Navajo Knobs trail) takes three to four hours, and the 9.4-mile round-trip hike to the Navajo Knobs takes six to eight hours.

TRAIL DETAILS:

The trail to all three of these destinations starts along the Fremont River and then heads down into a wash with a great view of the park’s namesake Capitol Dome.

After 0.2 miles you’ll reach the Hickman Bridge/Navajo Knobs junction. To see Hickman Bridge, a natural sandstone arch, go left. The trail gradually climbs 400 feet through a landscape defined by tall tan rock walls, junipers, cottonwoods, and ancient sand dunes. There are some artifacts of the Fremont people, like the remains of a pit house and of a granary, that you can check out along the way. The trail then comes to a junction, and you can go in either direction to circle beneath the bridge. The Hickman Bridge, which was shaped by flowing water, stands an impressive 125 feet high and is 133 feet long. 

LOCATION

Right off of State Route 24 – 3 miles west of the Visitor Center.

GPS COORDINATES

38.288780, -111.227650

GEAR CLOTHING WE NEEDED

With climbing up and down on sandstone it’s best to have good grip hiking shoes or sandals. Here are our favorites.

During those warm summer months just make sure to bring sun screen, a hat, and always extra water. We always like our Days packs with our hydration bladder. Here are a few of our favorites.

CAPITOL REEF GALLERY

BACK TO:

Click here to return to our Complete Guide to Capitol Reef National Park

RECENT POSTS:

JOHNSON CANYON HIKE

JOHNSON CANYON HIKE

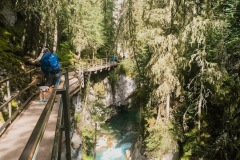
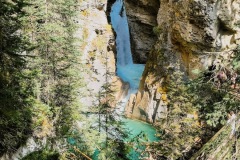
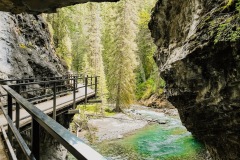
Take a catwalk with the steep walls of the canyon jutting high above you and the deep blue pools of the creek far below.

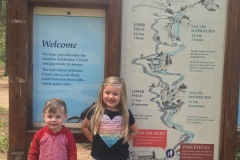
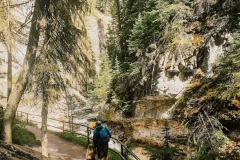
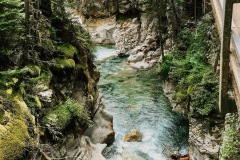
Carved steeply into the limestone bedrock by thousands of years of water erosion, the dramatic Johnston Canyon is a must-visit natural attraction in Banff National Park. Overhanging canyon walls, waterfalls, the deep pools of Johnston Creek, and lush forest are sure to leave a memorable impression. And it can all be experienced via an easy hike along smooth trails and catwalks, making it ideal for families and people of all ages.

It’s amazing how much varied scenery you see over the course of the very short 1.7 mile hike.

We hope you enjoy it as much as we did!

LENGTH:

  • 3.5 MILE ROUNDTRIP OR TO THE INK POTS FOR AN ADDITIONAL 3.6 MILES
  • Time to reach lower falls 30 minutes, 1.1 km one way, elevation gain of 30 meters.
  • Time to reach upper falls, one hour , 2.6 km’s one way, elevation gain of 120 meters.
  • Return trip going to both lower and upper falls allow 2 to 2.5 hours.

TRAIL DETAILS:

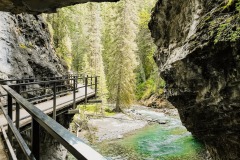
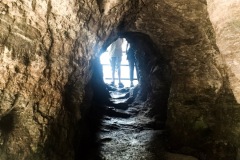
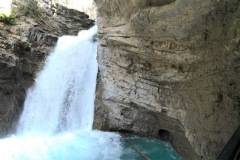
The trail to the lower falls covers minimal elevation as it works its way through the forest. It then takes you over catwalks alongside Johnston creek and up into the canyon above the rushing waters below. As the trail approaches the lower falls the first site that comes into view is a deep pool that has been created by the plunging water. A bridge crossing the creek serves as an excellent viewing spot, but there is another platform that sits within meters of the falls. To get to it you have to go through a tunnel in the canyon bedrock. Don’t be surprised if you and your camera get misted with water.

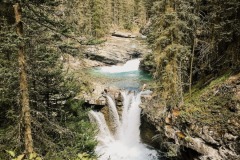
The trail to the upper falls covers more elevation as it climbs its through the forest and out of the lower canyon. It works its way back towards the creek and offers several scenic viewpoints, like this small set of cascading waterfalls. There are two viewing areas. The first is accessed by a catwalk that leads to a viewing platform looking across to the bottom of the falls. The other viewing area can be reached by taking a steeper trail to a platform overhanging the gorge. It looks across to the top of the falls that drop a dramatic 40 meters.

The Trail To The Ink Pots Beyond The Upper Falls

The Ink Pots consist of several pools made up of greenish coloured mineral springs that bubble to the surface. If you have time, carry on to the Ink Pots to leave the crowds behind you and get some solitude. From the upper falls the trail is a moderate climb out of the canyon for 3 km’s through the forest. It opens up to a meadow where the Ink Pots sit. The hike from the upper falls to the Ink Pots takes approximately one hour.

The Ink Pots are also accessible via Moose Meadows. This route completely bypasses the Johnston Canyon Trails. The trail head is located 1.4 km’s west of Johnston Canyon on the Bow Valley Parkway. It is 5.9 km’s one with an elevation gain of 215 meters. Allow 4 hours round trip.


TIPS FOR HIKING:

  • The trail has a lot of shaded areas, it can get cool even in summer months, dress in layers to adjust to the temperature as needed.
  • Pack drinking water and a snack

LOCATION

Johnston Canyon is located 25 kilometres (around 30 minutes’ drive) from the town of Banff and 33 kilometres from Lake Louise on the Bow Valley Highway.

The hiking trail starts at the northern end of the parking lot, right behind Johnston Canyon Lodge.

GPS COORDINATES

51.245748, -115.839925

AMENITIES:

There are washrooms at the parking lot, and a gift shop and restaurant open during summer at the Johnston Canyon Resort.

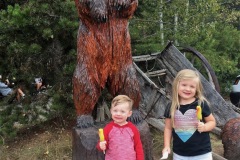
We promised the kids ice cream or a popsickle after the hike, and turns out they received it at the very end. Their was a cute little gift shop and tiny bar stool restaurant at the end of the hike. It was perfect and unexpected.

The trail to the Lower Falls is stroller and wheelchair accessible – after that there are a few steps.

GEAR CLOTHING WE NEEDED

.

JOHNSON CANYON GALLERY

BACK TO:

Click here to return to our Complete Guide to Banff and Jasper National Park

RECENT POSTS:

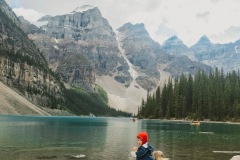
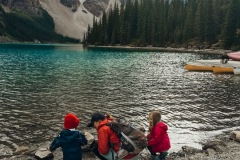
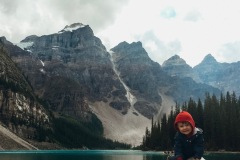
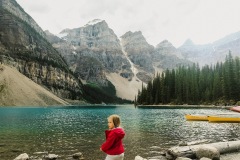
MORAINE LAKE – VALLEY OF THE TEN PEAKS

MORAINE LAKE – VALLEY OF THE TEN PEAKS

Sit lakeside and absorb the sights and pure mountain air, or explore further by canoeing and hiking. It’s an iconically jaw-dropping place that is sure to leave a lasting impression.

And guess what is the best part about it? No hike required. Park and Walk up – It’s located 8.7 miles outside the Village of Lake Louise. An absolute must see if you’re going to travel along the Ice Field Parkway.

If you ARE looking for a good hike – there are 5 main hikes starting at the lake. (Moraine Lake Lakeshore Trail, Eiffel Lake, Wenkchemna Pass, Larch Valley, and Sentinel Pass) We hope to do those one day! This time we just took in its beauty and took portraits of each other that still hang on our walls today. Memories.

WHEN TO GO:

It is best to go and be there before 10am, because the parking lot feels up. However it is pretty busy during peak season…we went in early September and tried to go twice but the road kept saying closed. Turns out once the parking lot fills up, they don’t allow anyone else up to drive up. It’s best to arrive before 11am or after 5pm for the road to be open easy.

The road to Moraine Lake is closed during the winter due to heavy snowfall and high avalanche risk. Depending on the conditions, the road opens sometime between the third week of May and the first week of June and closes in October after the Canadian Thanksgiving weekend (the second Monday in October). 

COST

FREE – Just park and walk

Canoe Rentals: $70/ hour

  • You’re also not allowed to put in your own canoe here. You do have to rent them at this lake.

THINGS TO DO:

  • HIKING
    • There are several hikes around the lake ranging from accessible walks to more strenuous hikes. The Rockpile Trail is an easy and short path with switchbacks along the back of the moraine to the top of the natural dam. The vista from the top is known as the “Twenty Dollar View”, as the scene featured on the back of Canadian twenty dollar bills issued between 1969 and 1979. 
    • Venturing further afield offers solitude from the crowds and a different perspective of the lake and its craggy surrounds. Other trails to explore include Moraine Lake Lakeshore Trail, Eiffel Lake, Wenkchemna Pass, Larch Valley, and Sentinel Pass. In the fall the larches light up in rich shades of yellow, gold, and orange and paint a surreal backdrop for a hike.
    • During times of high grizzly bear activity there are hiking restrictions in place for many of the trails in the Moraine Lake area. Learn more from the Parks Canada website.
  • CANOEING
    • Can I Bring My Own Canoe Or Kayak To Use At Lake Louise?
      • Yes, you can use your own canoe or kayak at Lake Louise or any of the lakes or rivers within Banff National Park. There’s no public boat launch at Lake Louise. You will have to carry your canoe from the government parking lot area and launch it from shore of the lake. Parks Canada offers more information on paddling in the parks.

LOCATION

It is about a 40 minute drive from Banff to Lake Louise. (80 minutes if you want the scenic route: Bow Valley route 1A.)

From Lake Louise Village, located just off the Trans-Canada Highway (Highway 1), drive uphill on Lake Louise Drive until you see the access road for Moraine Lake on your left. Follow the winding road for 11 kilometres (6.8 miles) to the parking area.

BACK TO:

Click here to return to our Complete Guide to Banff and Jasper National Park

RECENT POSTS:

ATHABASCA GLACIER TOUR: Columbia Ice Explorer & Skywalk

ATHABASCA GLACIER TOUR: Columbia Ice Explorer & Skywalk

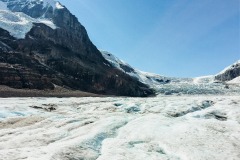
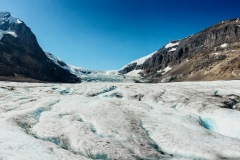
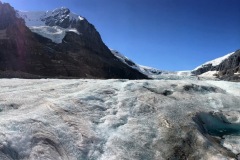
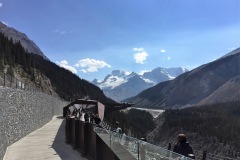
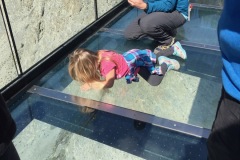
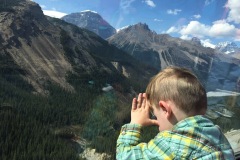
Travel on a massive Ice Explorer to a place where you can walk on, feel and drink from the Athabasca Glacier. Then, take a jaw-dropping walk along the glass-floored Skywalk at the cliff’s edge.

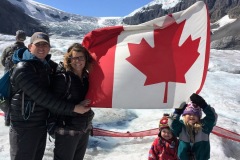
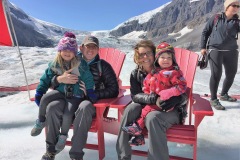
If you’ve seen our other posts then you know that we’re normally not the “tour” tourist. We tend to stay with the free hikes, but Banff and Jasper have these amazing packages that include some pretty cool site seeing that we just couldn’t turn down. Part of our Brewster Package was the COLUMBIA ICE EXPLORER. This giant Ice Explorer takes you up on the Athabasca Glacier! You get to walk on this amazing glacier that you’ve been seeing for miles!

And we of course has to have a snow ball fight!

COST

We purchased the JASPER ULTIMATE EXPLORER COMBO PACKAGE from Brewster Pursuit which included: Maligne Lake Cruise, Ice Glacier Explorer, Sky Walk, and the Banff Gondola.

The Total cost for all 4 excursions was $552 for all 4 of us. Which came to $184 /per adult and $92 per kid, however if you divide that by 4 excursions then it comes to $46 per person per excursion.

Ala Carte Pricing For both Ice Explorer and Skywalk.

  • Around $100/ adults and $50 per child.

If you are short on time or only want to do the Sky Walk it is $30/ per person. However, for $20 more you might as well do the Glacier. It was the best part! I think $30 is too expensive for just the Skywalk. Just our opinion.

LENGTH

The Columbia Icefield Adventure (including the Columbia Icefield Skywalk) tours departs every 15 to 30 minutes throughout the daily hours of operation.

The adventure lasts approx. 2.5 to 3 hours round-trip.

You’ll learn how glaciers are formed and see other incredible geological features. The Glacier Adventure operates from mid April to mid October inclusive (weather permitting). Tours depart every 15 minutes so that makes timing really nice!

LOCATION

The Glacier Discovery Centre, located on the boundary of Banff and Jasper National Parks, offers interpretive exhibits, interpretive scenic walks, self guided trails, dining room, cafeteria, gift shop and over night accommodation. A perfect midway adventure on the Icefield Parkway!

GLACIER EXPLORER GALLERY

SKY WALK GALLERY

BOOKING DETAILS:

BOOK YOUR EXCURSIONS:

The first thing I did when I got to town was go and purchase my excursion package. You can also do this online ahead of time as well. The pricing is very reasonable.

We recommend doing the Maligne Lake Tour, Columbia Icefield Glacier Discovery that includes the Icefield Skywalk, and the Banff Gondola. They we’re all amazing.

GEAR/ CLOTHING WE NEEDED:

BACK TO:

Click here to return to our Complete Guide to Banff and Jasper National Park

RECENT POSTS: