Without question I found this to be the hardest part of building a van. I looked at all sorts of online wiring diagrams and watched countless hours on Youtube. There were times where I just sat there and looked at everything I had bought and thought I was in over my head. To be honest, I probably was. Batteries contain a lot of power and I always kept that in mind with everything I did. So far everything has worked flawlessly and the van has yet to catch fire.
For someone who doesn’t know too much about electrical systems there is a lot to figure out before you begin. What type of battery and how many do you need? How many amps does everything you’ll install? What size inverter is best? Do I have enough solar? Is this wire the correct gauge? It’s a little daunting. Once you have figured some of these things out it’s time to get that credit card and get to work.
The main expenses for our system were:
- The batteries $1200
- Soar panel $300
- Rack for Solar Panel $250
- MPPT Solar Controller $225
- Battery Monitor $225
- DC to DC Charger $400
- 2000 Watt Inverter $375
I bet I spent another $600-$800 on the wiring, outlets, lights, fuse panels, circuit breakers, crimps, and all sorts of other random electrical things. I had an idea of the cost, but once I list everything we bought I realize that electrical systems are expensive. You could do this much cheaper and you could spend a lot more as well. We bought quality products and they should serve us well for years to come.
BATTERIES:
In our last van we had about 200 amp hours from lead acid batteries. I was always worried that our batteries would be tapped out when we parked for extended periods. It was worth my peace of mind to make sure we had plenty of battery this build. To be honest we probably have too much. During my research I found a company called Valence that makes very high quality Lithium batteries for the medical industry and other industrial applications. There are a lot of youtube videos that discuss them and after I watched a couple I was sold. Originally I had planned on two Battleborn Batteries for 200 amp hours and a cost of $2000. By going with a lightly used(less than 100 cycles) set of 3 Valence Batteries we have 414 amp hours for a total cost of $1200. This was kind of leap of faith based on what people on the internet had deemed to be solid batteries and I was a little apprehensive because they have no warranty. Once they arrived I was stoked as they are very well made and looked like new. Having used them for 3 months, we’ve never had our depth of discharge drop below 55% and that was after we had been parked for 6 days straight with stormy weather affecting the solar for the last two days. As of right now I would buy these again without hesitation, but I’ll write an update after 9 months of daily use.
SOLAR:
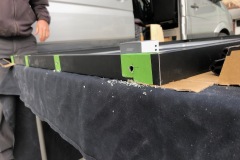
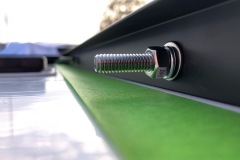
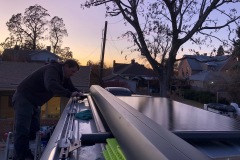
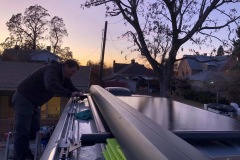
For solar I followed the build of OurKaravan. (If you haven’t seen anything from him, check out his Youtube channel now. His van is crazy nice and some how he’s even nicer.) He used a residential solar panel and I followed suit. We went this route for a couple reasons:
- We only had a certain amount of roof space between our two fans and this single panel fit perfectly.
- It’s only one panel that puts out 320 watts. Most commonly found panels put out about 100 watts each. More panels would require more bars for the roof rack, more connections, more wiring, and more expense.
- Panasonic panels are stout. They’re engineered to handle hailstorms and hurricane winds. Our particular panel is rated to 5400Pa which equates to wind speeds over 200 MPH!
- I really dig the all black look. I know that doesn’t count for much because it’s on the roof of a 9 foot tall van, but the black frame goes with our silver and black motif.
The only bummer is I had to call quite a few solar companies and really search to find the one I wanted. I felt lucky to find one locally as shipping it would have been cost prohibitive ordering just one panel. I would undoubtedly use this same panel again.
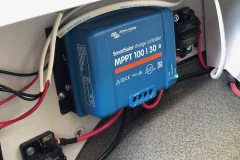
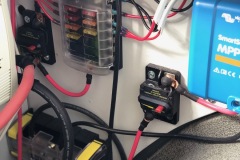
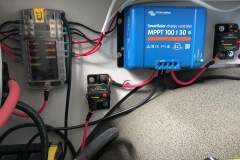
With all the power our panel creates on a sunny day we needed a good solar controller to really harness it. We decided to go with a Victron SmartSolar MPPT 100/30 solar controller. Victron is a leader in solar equipment and this controller has been great. We also have a Victron BMV-712 Battery Monitor. This a screen that’s mounted in the van and allows you to see how the battery and everything related to it is doing. Both components have bluetooth which allows you to sync up with their app. This is where this system shines. The Victron app is fantastic. There are so many options and you can easily set all the charging parameters for you batteries. Keri makes fun of me because I love to check it and see how many amps we’re using when cooking or how much solar power we’ve averaged over the last week. Data is fun.
BATTERY TO BATTERY CHARGER
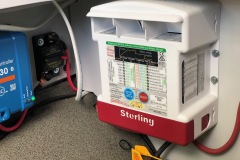
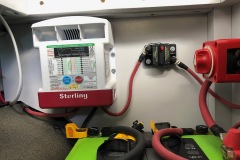
I debated whether to buy a charger that would allow us to charge the batteries from the alternator or not and I’m glad I did. When planning a 2.5 year trip to places I’ve only read about, I have no clue what to expect weather wise. If we get stuck in a place where storms roll in for a week at a time it could render our solar panel useless. By having this charger we can quickly top off our batteries in a matter of an hour or two drive. We have the Sterling Pro Batt Ultra Battery to Battery Charger 60 amp version. This is a nice piece of kit as well. The installation wasn’t hard and I’m impressed with the amount of settings it has to accommodate any kind of battery. It seems like a good buy, but there are other less expensive options that have recently come to market.
INVERTER
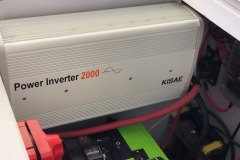
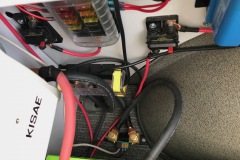
We needed to have an inverter to mainly run our induction cooktop and instant pot. Almost everything else runs off USB or 12v. There are so many options when shopping for an inverter. We decided to go with one in the middle of the road price wise. It’s a Kisae SW1220 2000 True Sine Wave Inverter. I chose it because it fits dimensionally to the space we had available and it was on sale. We added a remote mount on/off switch, so we don’t have to raise rear bench lid anytime we turn it on. This has been really nice. The power from the inverter is wired to a GFCI outlet next to the light switches in the kitchen. It powers our cooktop and instant pot simultaneously without complaint, so I like it. Time will tell how it holds up.
SMALLER COMPONENTS
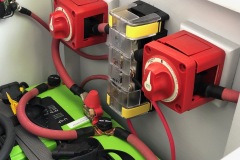
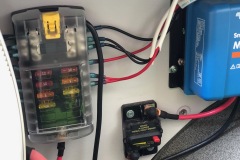
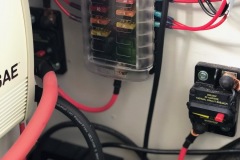
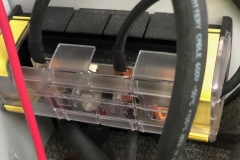
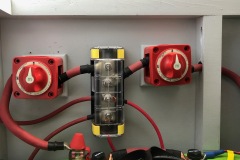
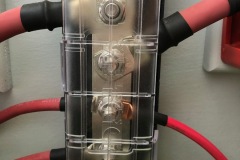
For all the smaller components like fuse panels, circuit breakers, bus bars, light switches, USB ports, and shut off switches I only used Blue Sea Components. They make things primarily for the marine industry and everything is made to a high standard. We have two 12 slot fuse panels dividing power to everything in the van. They make a lot of different fuse panels, but I would make sure to get one that has a negative terminal. This makes it easy to hook everything up at the panel. If I need anything for the van and Blue Sea makes it, that’s what I’m going with.
WIRING
Another brand that I really like is Ancor wiring. I used several hundred feet for everything in the Sprinter. Ancor duplex wiring made it easy to get it all dialed in. Having a duplex wire makes it effortless because you have two wires run in a single sheathing. I also noticed that if I had to use another brand they were not nearly as flexible as the sheathing was way too stiff. The van required a lot of different size wiring from 2/0 AWG to 16 AWG. I decided to make all the battery connections as they required custom lengths and to do that I needed to get a crimper that you hit with a hammer. It worked great allowed me to get the exact length I needed without dealing with extra wire everywhere. Be sure to test fit everything in place as well because the 2/0 wire is stiff and if you cut it short, you’ve got to start over.
LIGHTING
The van is super well lit and I like that. It is set up in 7 different zones. The front bench, the kitchen, under the kitchen cabinets, the dinette, under the dinette cabinets, the rear doors, and the awning. The kids also have their own remote controlled lights in their bunk beds. Everything is LED and draws very little power. Personally I like a warmer light than a cool blue light, so be careful and look out for what you like when ordering lights from Amazon or anywhere else. Another nice thing is having a dimmer switch. Sometimes the van doesn’t need to be fully lit up, so we just dial it back a little bit. My favorite lighting in the van are the under cabinet light strips. We used led strip lights and installed them in aluminum channels with plastic covers for a more finished look. For the switches we have some nice touch switches with built in dimmers. It seems like almost all dimmer switches are illuminated. Those really bug me at night, so if you don’t want them lighting up your van at night try to get one without a light.
I didn’t want to get too technical with this article, but if you have any questions about what specifically we used and why we chose what we did, please reach out to me. I love talking about this stuff and I would dig being able to help anyone with a build. Building a van is fun, but using it is way better. Setting up an electrical system can be dangerous during the installation and later down the road. Be careful and use your best judgement.
-SCOTT
SOLAR & ELECTRICAL GALLERY:
There are 2 pages of pictures. Make sure to click the #2 at the bottom to view the complete build.
We listed a few details of what we did at the bottom of each picture. If you have any questions about this build feel free to reach out to us.
![]() CLICK 2 FOR MORE PICTURES
CLICK 2 FOR MORE PICTURES ![]()
VAN BUILD GUIDES:
VAN PURCHASES

Van Build

Van Accessories
OUR FIRST VAN BUILD: RUSTY
Our first van, Rusty, a 144 low roof Sprinter Van.


BEFORE & AFTER

